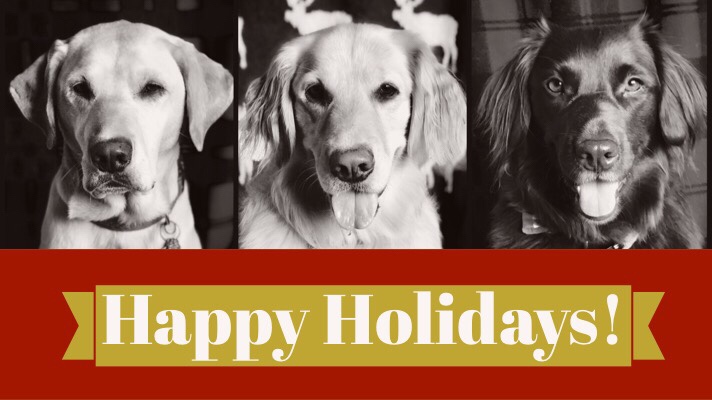
Simple design using head shots I took then created this composite image with Adobe Spark Post
Fayston, Vermont. The Halloween candy is in the stores, so that means it’s time to prepare your end of the year holiday cards. You’ve had a lot of practice since my last how-to photograph dogs blog post, so hopefully you have saved a few favorites. If not, don’t worry! Here are a few tips for taking a “studio” head shot in your own home with your cell phone that you can use for your card. No snow required.
What you’ll need, in addition to your fully charged smart phone:
- A clothes hanging rack. Not a sweater drying rack, but a tall, adjustable rack on which you normally hang pants and dresses.
- Pant hangers – the kind with clips. Or drapery clips. I used pant/skirt hangers.
- A festive and clean backdrop. A tablecloth or large throw/blanket works well. I used a plaid fleece throw, but if you choose a solid color you don’t have to worry as much about hanging the backdrop super straight. If you live near a fabric store (I don’t), buy a few yards (3-5, depending on the size of your dog and if you want some floor coverage) of velvet – try a dark red or blue or black. A roll of craft paper works, too. Use a seasonal color for whatever holiday you celebrate. Maybe you want to make a Halloween card AND a holiday card!
- A tripod for your mobile device is also recommended, especially if you want to be in the photo, too. Mine is a Joby GorillaPod, purchased a few years ago for around $25. Search Amazon or B&H Photo for a similar gadget.
- A room with lots of natural light that’s big enough to set up the clothes hanging rack and space to take a photo. I used my palatial master bath/laundry room because it has large windows and a lot of floor space. The garage with the door open also works for this project. Or, if it’s a nice day, find a flat spot in your yard without direct sunlight.
- Treats, squeakers, or whatever you need to get your dog to look at the camera. Lucy responds to my Donald Duck voice. If you are feeling ambitious, gather other seasonal props, such as costumes, scarves, hats, lights, etc.
- Your dog, after you’ve set up your studio.

Rack and hanger set up

My iPhone tripod, with an old phone
Studio Assembly
Clip the long end of your fabric to the hangers and hang on the rack. Take care to hang the fabric straight if you are using patterned fabric. The clips should hold multiple pieces of fabric so you can flip one over for a new look. (See image, below.) Perhaps you’ve seen a “photo booth” at a party or fundraising event – this is a down-and-dirty simple version.
Tip: If you want the whole dog in your picture, puddle the fabric on the floor so that the floor doesn’t show in your photo. Have doggo sit or stand on the fabric puddle. You can also use a second piece of matching fabric for the floor.
Set up a test shot to make sure you know where to sit to take the photo and where your dog will sit. Use a stuffed animal or a backpack as a stand-in and take a test shot. You’ll need to be about four feet from your subject. (My phone camera warns me when I’m too close or too far. Apple thinks of everything…) If you don’t have enough room, pick up the rack, fabric and all, and find a new location.
Adjust the backdrop to the light source, if necessary. I changed the angle of my backdrop slightly after my initial test.

Test shot for lighting with Charlie Brown
Take your shot
Now it’s show time. After you’ve exercised your dog, it’s time to take photos. I had to wake up Linus and motivate him to leave the couch.
- Bring doggo into your “studio” and have him sit in front of the backdrop. Set up any props or costumes.
- Use the “Stay” command while encouraging ear perk with a squeaker or small treat held near the camera lens.
- Select the Portrait setting if you have it.
- Hold the smartphone camera level with your dog’s eyes. On the screen, tap on your dog’s eyes.
- Then snap! For best results, use the tripod to prevent camera shake.
This will likely take a few tries, but your dog will love the attention. Stay positive and task focused. Reward and praise your dog! If you’re not seeing the image you like after a few takes, try again later.
Plan B: If your pooch is used to being held (and has trouble with “stay”), consider being in the photo with her. Figure out where you are going to sit and do a test shot or two. Now the tripod is mandatory. With your phone in the tripod, set the timer on your smartphone camera for three seconds. Gather your dog and sit on your mark, looking at the camera (or kissing, laughing and of course smiling) until the shutter clicks. If three seconds is too short for you to find your mark, try 10 seconds on the timer.
Caveat: My dogs are NOT used to being held. After setting the timer on my smartphone, I crawled over to sit next to test subject Lucy. She saw this as playtime and began enthusiastically licking my face. (I should have known this was going to happen – it’s why my dogs are banned from the room when I need to stretch.) My photos were a hot mess of blonde blur. Bonding, 10; quality photograph, 0.
Plan C: Consider asking a family member or friend to help by hitting the shutter button. Bribery (um – reward) works for people, too. Coffee is a fine offering for my help, but you might try wine. Invite your helper to use your studio, too! Swap out the fabric for a new background and a different look.
Edit time (or, fun with apps)
One you have taken the photo you like, it’s time to let doggo finish his nap while you edit. Simply using iPhoto’s magic wand (or whatever photo app you use) and a bit of cropping will improve your image, but with a few more clicks, you will create more professional looking results.
Tip: Browse through the printed photo card choices online and pick out a few favorites before you crop. Knowing what aspect ratio you’ll need will save you from re-editing if you choose a card that calls for a 3:2 image but you’ve made yours 1:1. Wait a minute – what? 1:1 aspect ratio is square – the top and sides are the same. 3:2 is the size that will yield a 6 x 4 inch print – a rectangle. Your phone is 4:3. Aspect ratio is the width to height comparison of a photo.
For printed photo cards, you have a lot of online options, including Snapfish, Shutterfly, mpix, and Nation’s Photo Lab, to name a few. Many companies offer dog specific cards. If you don’t have a favorite printer already, ask a few friends who send great cards for recommendations. Once you browse the cards and make your choice, simply upload your photo and choose quantity.
For a complete and easy-to-use photo editor, one of my favorites is Snapseed. Snapseed is a Google product found for free on the App Store and also available for Android. It has editing “tools” and filters, called “looks.” Sometimes I need to lighten my image before I apply a filter, so I go to the “tools” section before going to the “looks” section (filters). Snapseed lets you save a copy or modify the original, and it lets you undo edits even after you’ve saved them.

Magic wand and cropping in iPhoto

Image brightened and Snapseed portrait filter applied
Another editing app I use is PicsArt. PicsArt has many fun filters and easy-to-use editing tools, plus it has a cut-out feature. If you want to remove the background on your headshot, tap the scissors icon, then swipe your finger over the areas of the image you want to keep. Fine tune the cut-out with the eraser tool. Apply the filter and you’ve just created a sticker that you can add to another image. Or, you can change the background to a solid color or a pattern. I used PicsArt to create the image of Linus, below right. Even though the background of my original image was simple, the plain black gives the image more punch.


If you have some down time and really want to play with photo editing, try Enlight Photofox. I have the older, paid version of Enlight; Enlight Photofox is free but has subscription-based add-ons. Either Enlight or Enlight Photofox will let you layer images to create something completely new. Don’t be afraid to play! I had a long wait at the doctor’s office, so I followed one of the tutorials to create this stylized portrait of Linus (below).


To make a funky digital card for social media, try Photo Lab – you pick a frame, then add animated effects and type to your headshot. (See Linus image at the bottom of this post.)
For a more sophisticated look, take a look at Adobe Spark Post. It’s another graphic design and collage app I like for graphic layouts such a digital holiday message for social media. I used Spark Post for the title image.
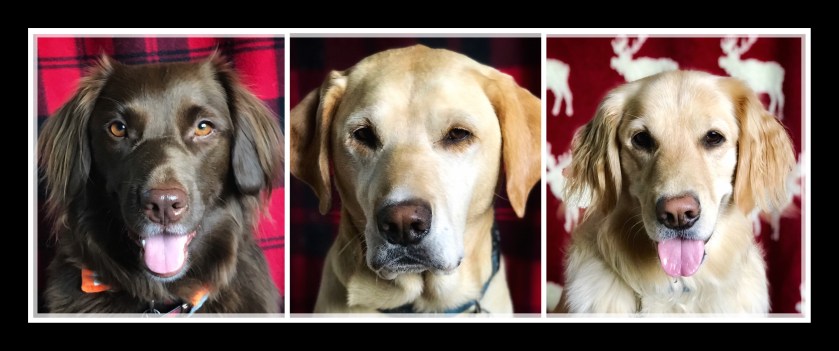
PicsArt collage of Charlie Brown, Linus, and Lucy
Tip: If you are using more than one headshot, make all the heads the same size. I need to resize Lucy in the above collage.
Design note: Many of the card designs are so colorful that your photo in black and white makes an elegant finished card. (See image at the top of the article.) Duplicate your image and make it black and white by using your photo editing app. Upload the black and white version to see which way you like it. Some of the card makers will let you edit your photos, but I feel that I have more control (and better results) if I make a second version to upload.
P. s. Why am I writing this post in September? This home studio set-up also works great for showing off your dog’s Halloween costume!!! Plus, if you have your holiday card ready to go early, you’ll likely find a great price on printing and have one less thing to do once December comes. Because it’s all about the cookies, really.
Finally, please share your work with wagmorevt.com! I’d love to see your dogs! I’ll add your photos to a future post. Thank you.
Have fun!

Linus head shot in Photo Lab. Scrooge effect is all Linus…
